Truly fine
Documentation.
Add custom CSS to your store
Last update:
In this guide we’ll go over how you can add custom CSS to your Athens theme. There are two ways we’re going to cover, editing the base.css file directly, and creating a new custom.css file (which is the recommended approach).
Using the theme’s code editor
Both approaches require accessing the theme’s code editor from within the Shopify admin.
You can find it by going to your store admin, then from the left navigation menu Online Store > Themes > Actions dropdown > Edit code.

You will be presented with the screen above, and you’ll be able to edit any file.
A couple warnings and disclaimers:
- Editing theme files can result in broken functionality. Please make sure you’re 100% sure about the code you’re editing.
- When updating a theme to a newer version all custom edits you’ve made in all files will be lost (that’s how Shopify works). It is strongly advised you keep backups of your edits in case you need to restore them.
Option 1 – Edit the theme’s base.css file
This is the simplest method to add a custom piece of CSS to your theme. Simply open the code editor (by following the instructions above) and open the file base.css inside the Assets folder.
Scroll all the way to the bottom, leave a couple of empty lines, and type or paste your custom CSS.
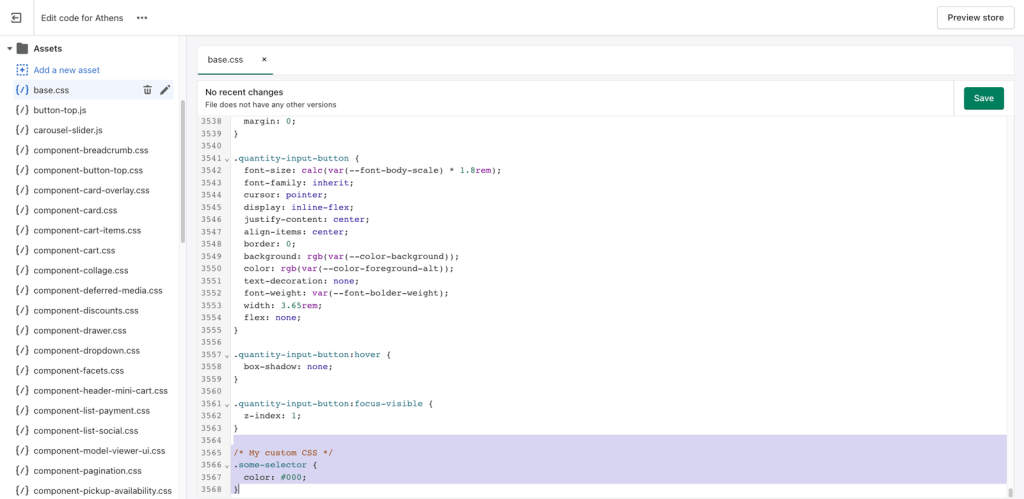
After that’s done, hit the “Save” button on the top right, and you’re done.
Option 2 – Add a new custom.css file
This method is a tad more involved but it’s the recommended option because it makes it that much easier to keep track of your styling changes and save/restore them when you upgrade your theme to a newer version.
Again, the first step is to need to access the theme’s code editor as before.
Then, navigate and expand the Assets folder and click on “Add a new asset”. Go to the tab titled “Create a blank file” and name your file “custom“. Your extension should be css.

The editor will open your custom.css file and you’ll be able to add any styles to it as you could do in the base.css file.
The final step to this to enqueue your new stylesheet: Open the file named “theme.liquid“, and locate the line {{ 'base.css' | asset_url | stylesheet_tag }}. Copy that line, and paste it right below, then simply change base.css to custom.css on the new line so that you end up with the below:

Hit the Save button on the top right, and you’re set; any changes you add in the custom.css file will be reflected in your website.
Can't find what you are looking for? Feel free to submit a request.