Truly fine
Documentation.
Enabling backorder on products
Last update:
In today’s competitive e-commerce environment, maintaining customer interest and sales momentum, even when products are out of stock, is crucial. One effective way to achieve this is by allowing backorders.
A backorder product is a product that used to be in stock, but its stock has been exhausted. However, it can be purchased, and it will be fullfilled once it’s back in stock.
In contrast, a pre-order product is a product that was never in stock before (perhaps not even released yet).
In this guide, we will walk you through the process of setting up backorders for your products. Whether you’re new to Shopify or looking to optimize your store’s functionality, this guide will provide step-by-step instructions to help you leverage the power of backorders and keep your sales going strong.
Setting up the product
A couple steps are needed to set up a product for pre-ordering:
- Navigate to Products: From your Shopify admin, click Products in the left-hand menu.
- Select the product: From the products page, select the product you wish to allow backorders for. You can do this by clicking on the product’s name.
- Enable “Continue selling when out of stock”: In the Inventory section of the product page, expand More details and enable Continue selling when out of stock.
If the product has variants, go to the Variants section and make sure Continue selling when out of stock is enabled for each variant you want to allow backorders for. - Save your Changes: After you’ve checked the “Continue selling when out of stock” setting, click on the “Save” button at the top right of the product page to save your changes.
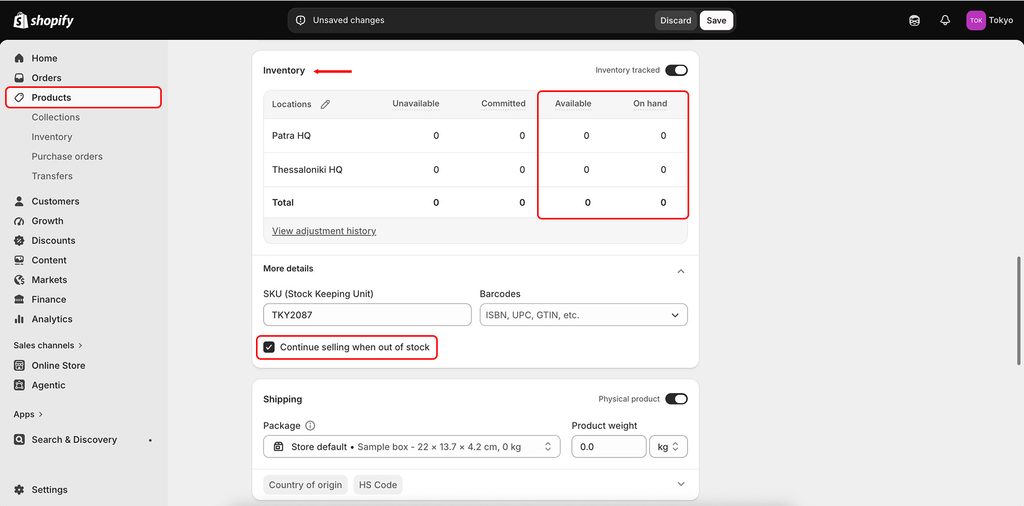
Now, even when the product or its variants are out of stock, customers will be able to backorder them.
You will notice however, that the product’s “Add to cart” button and its availability badge will appear as if the product is in stock.

Customizing the appearance
Add to Cart button
To change the text of the “Add to cart” button, open the Translate & Adapt app, and select English from the Localized content dropdown. Then, scroll down to the Theme section and select Default theme content.
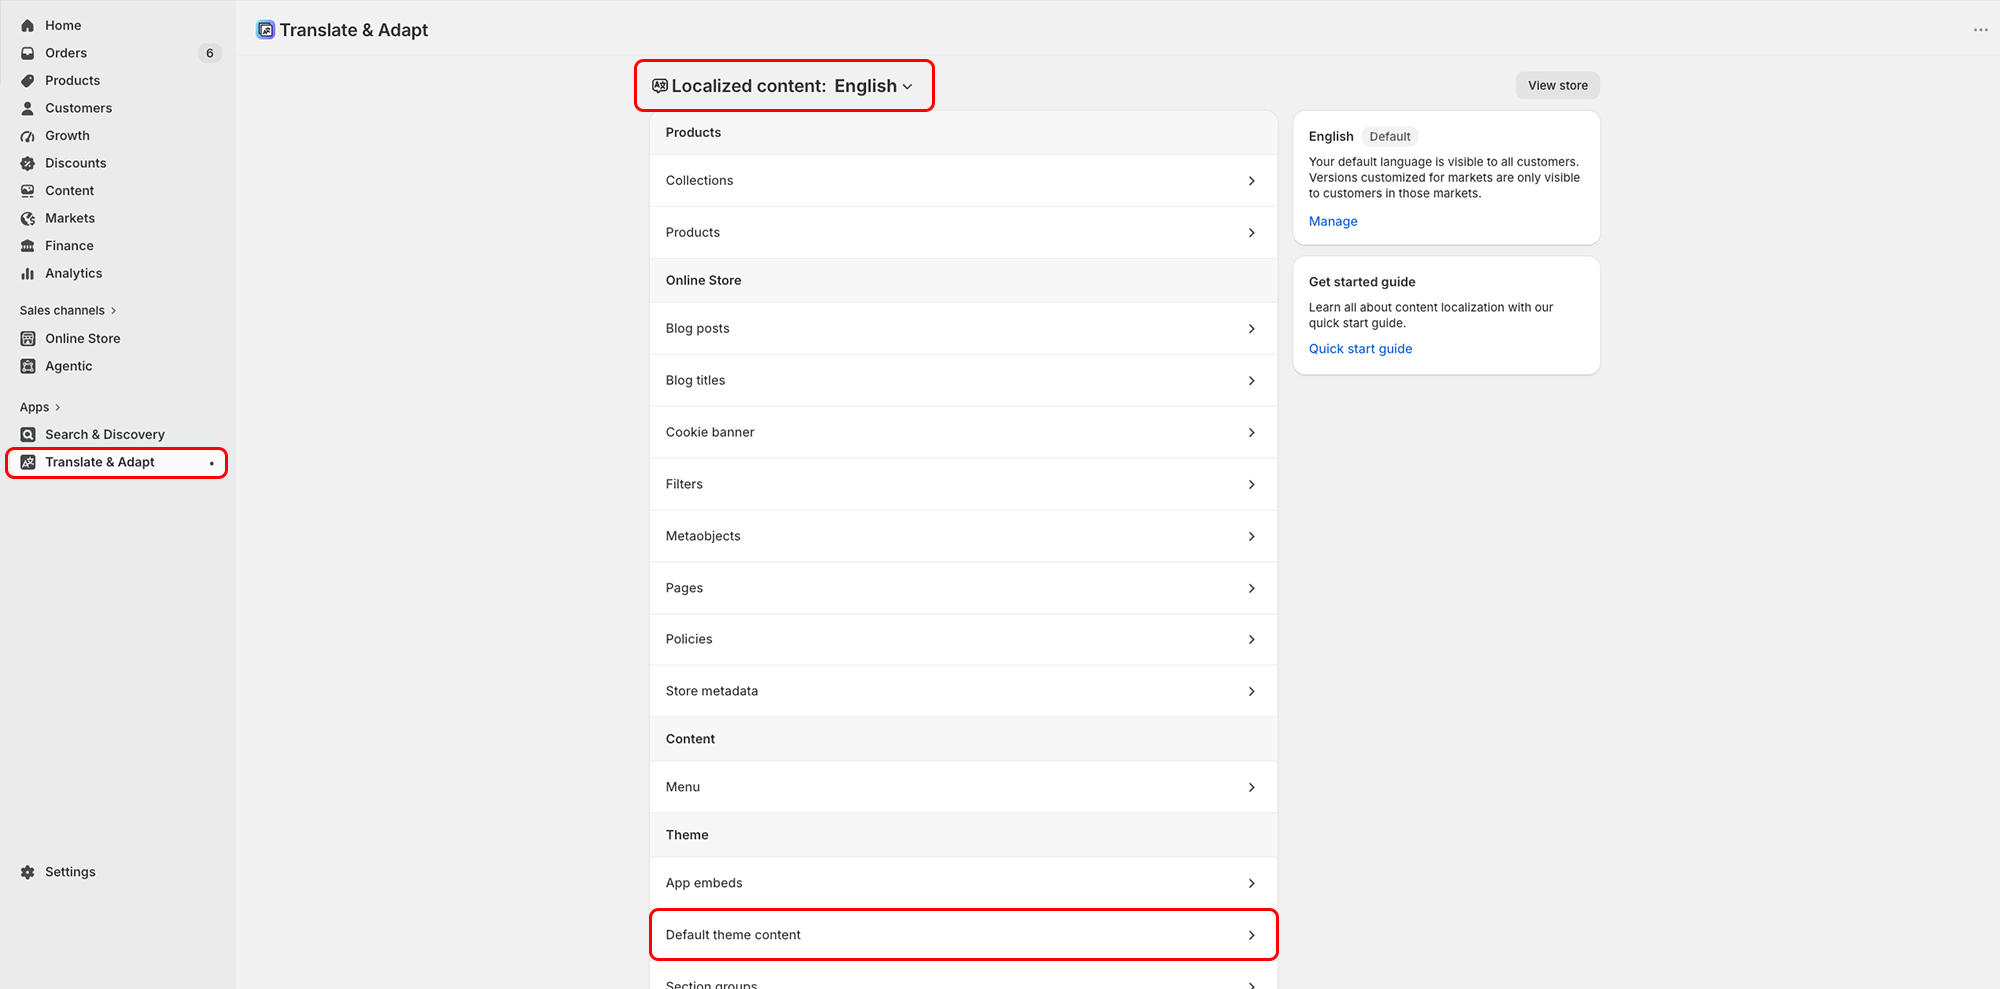
On the next screen, use the “Adapting…” dropdown at the top of the screen to select the market and language you want to customize.
Next, select Products from the left-hand menu and locate Product: Backorder. You may need to scroll through the list to find it.
Change the “Add to cart” text to “Backorder”, or enter any other text you prefer, then click Save.
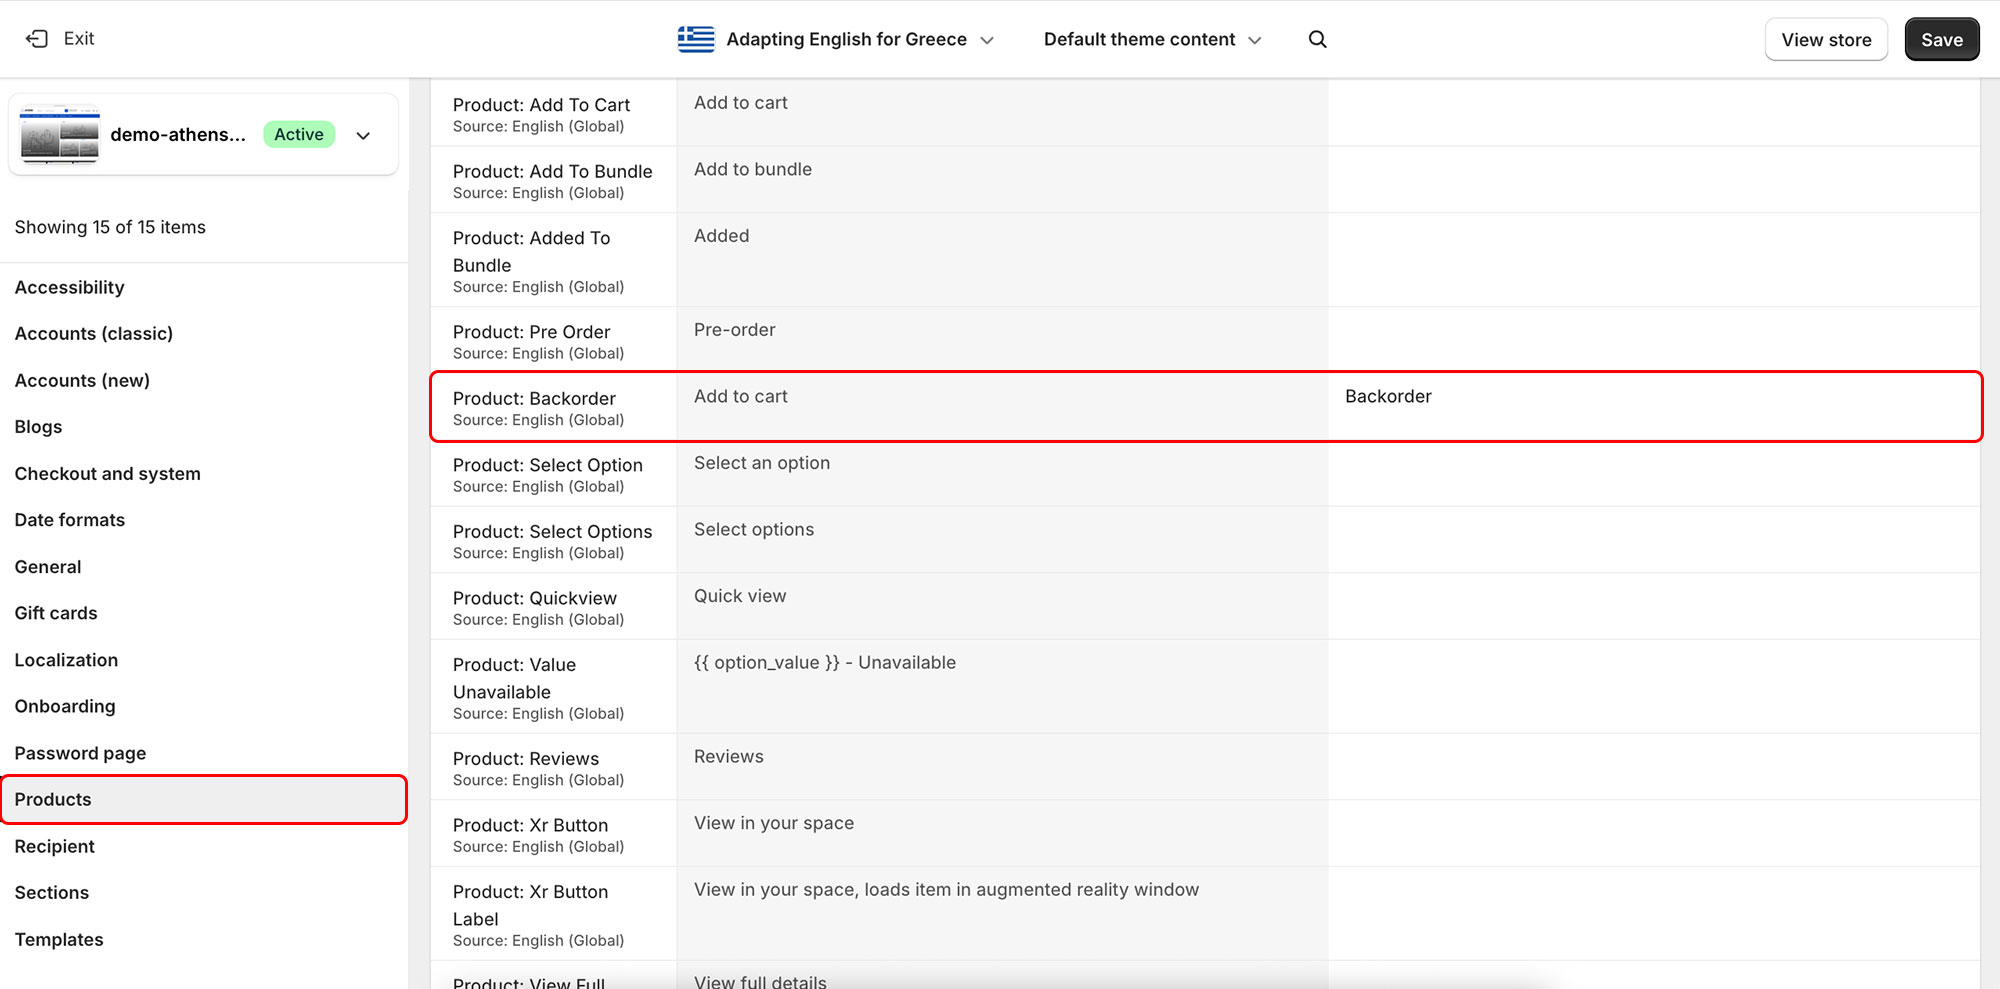
If your store is available in mutliple markets and/or languages, repeat the process for each one.
Availability badge text
Follow the same process as the Add to Cart button above. After selecting Products from the left-hand menu, locate Availability: Backorder under Product availability. You may need to shift through the pages at the bottom of the screen to find it.
Change the text from “In stock” to “Backorder”, or enter any other text you prefer, then click Save.
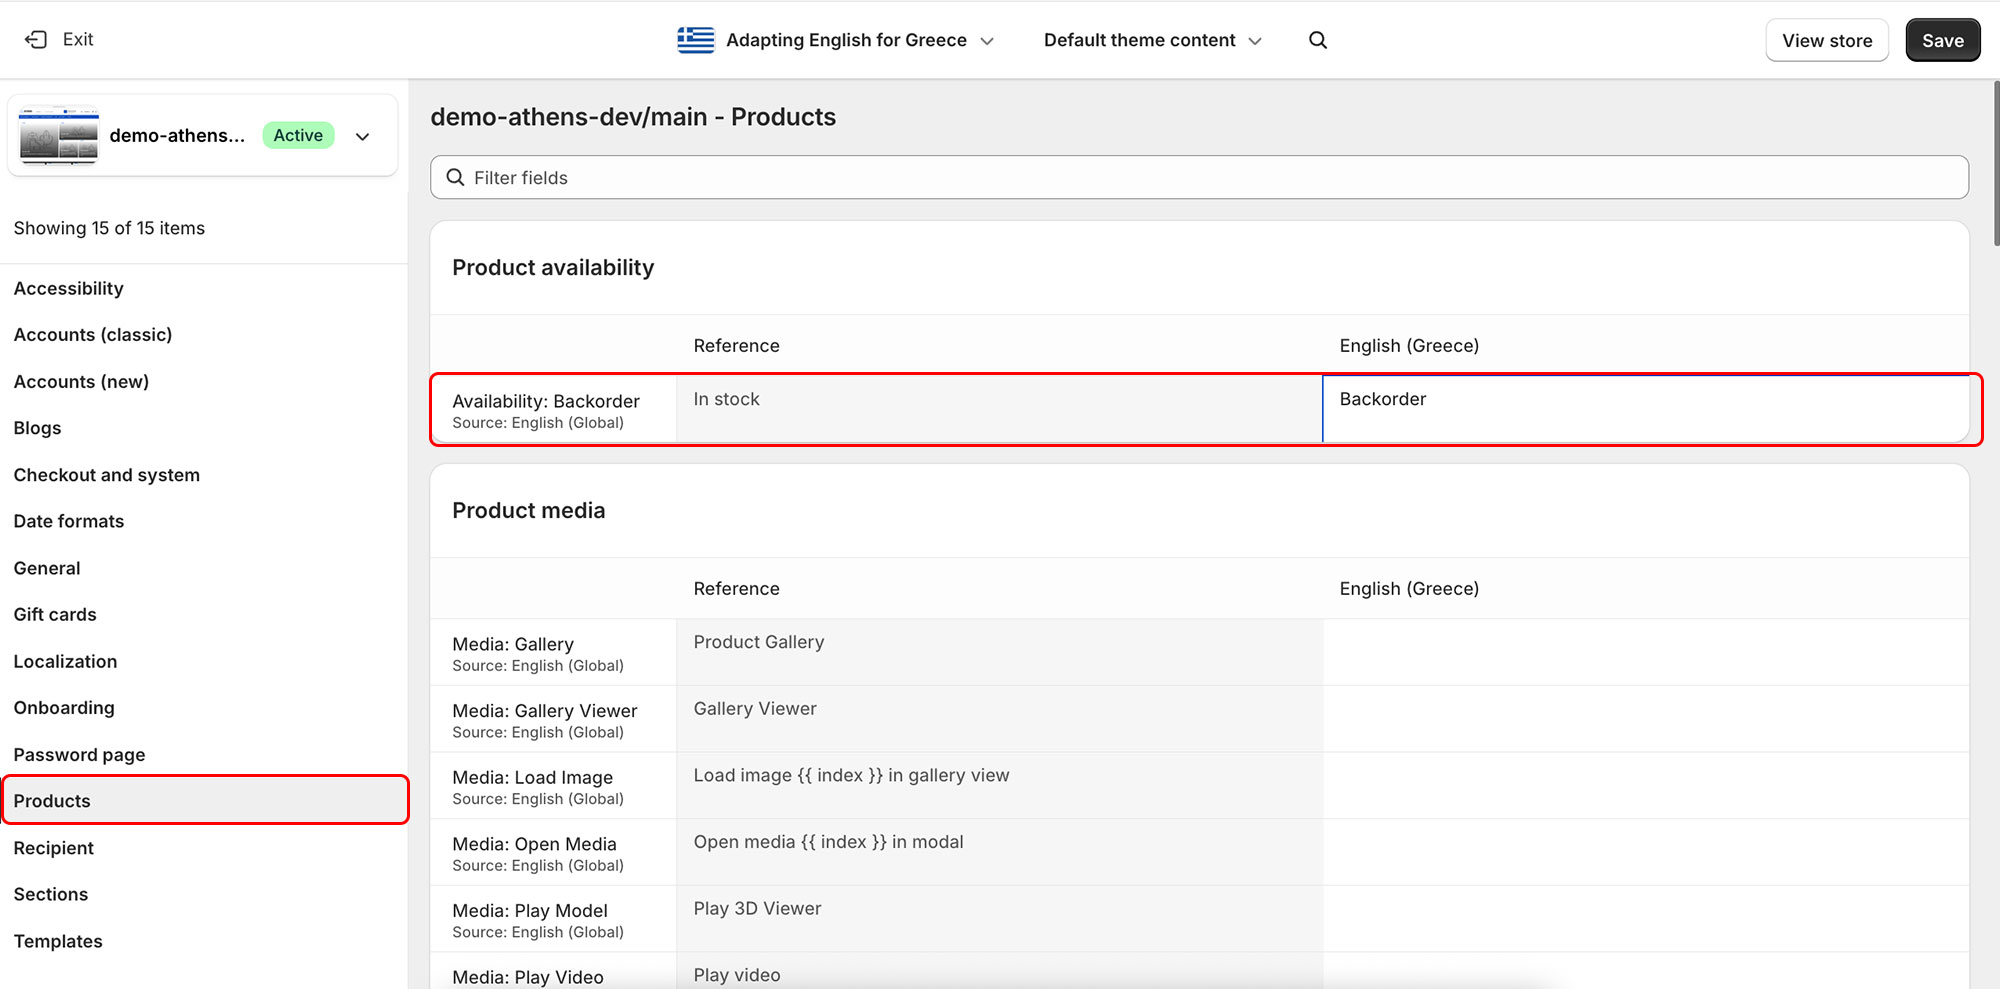
If your store is available in mutliple markets and/or languages, repeat the process for each one.
Availability badge color (stock labels)
To change the availability badge’s color when a product is on backorder, go to Online Store > Edit theme > Theme settings > Colors. Under the Stock labels section, select the color for the “Backorder badge”, and press the “Save” button at the top right of the customization page to save your changes.
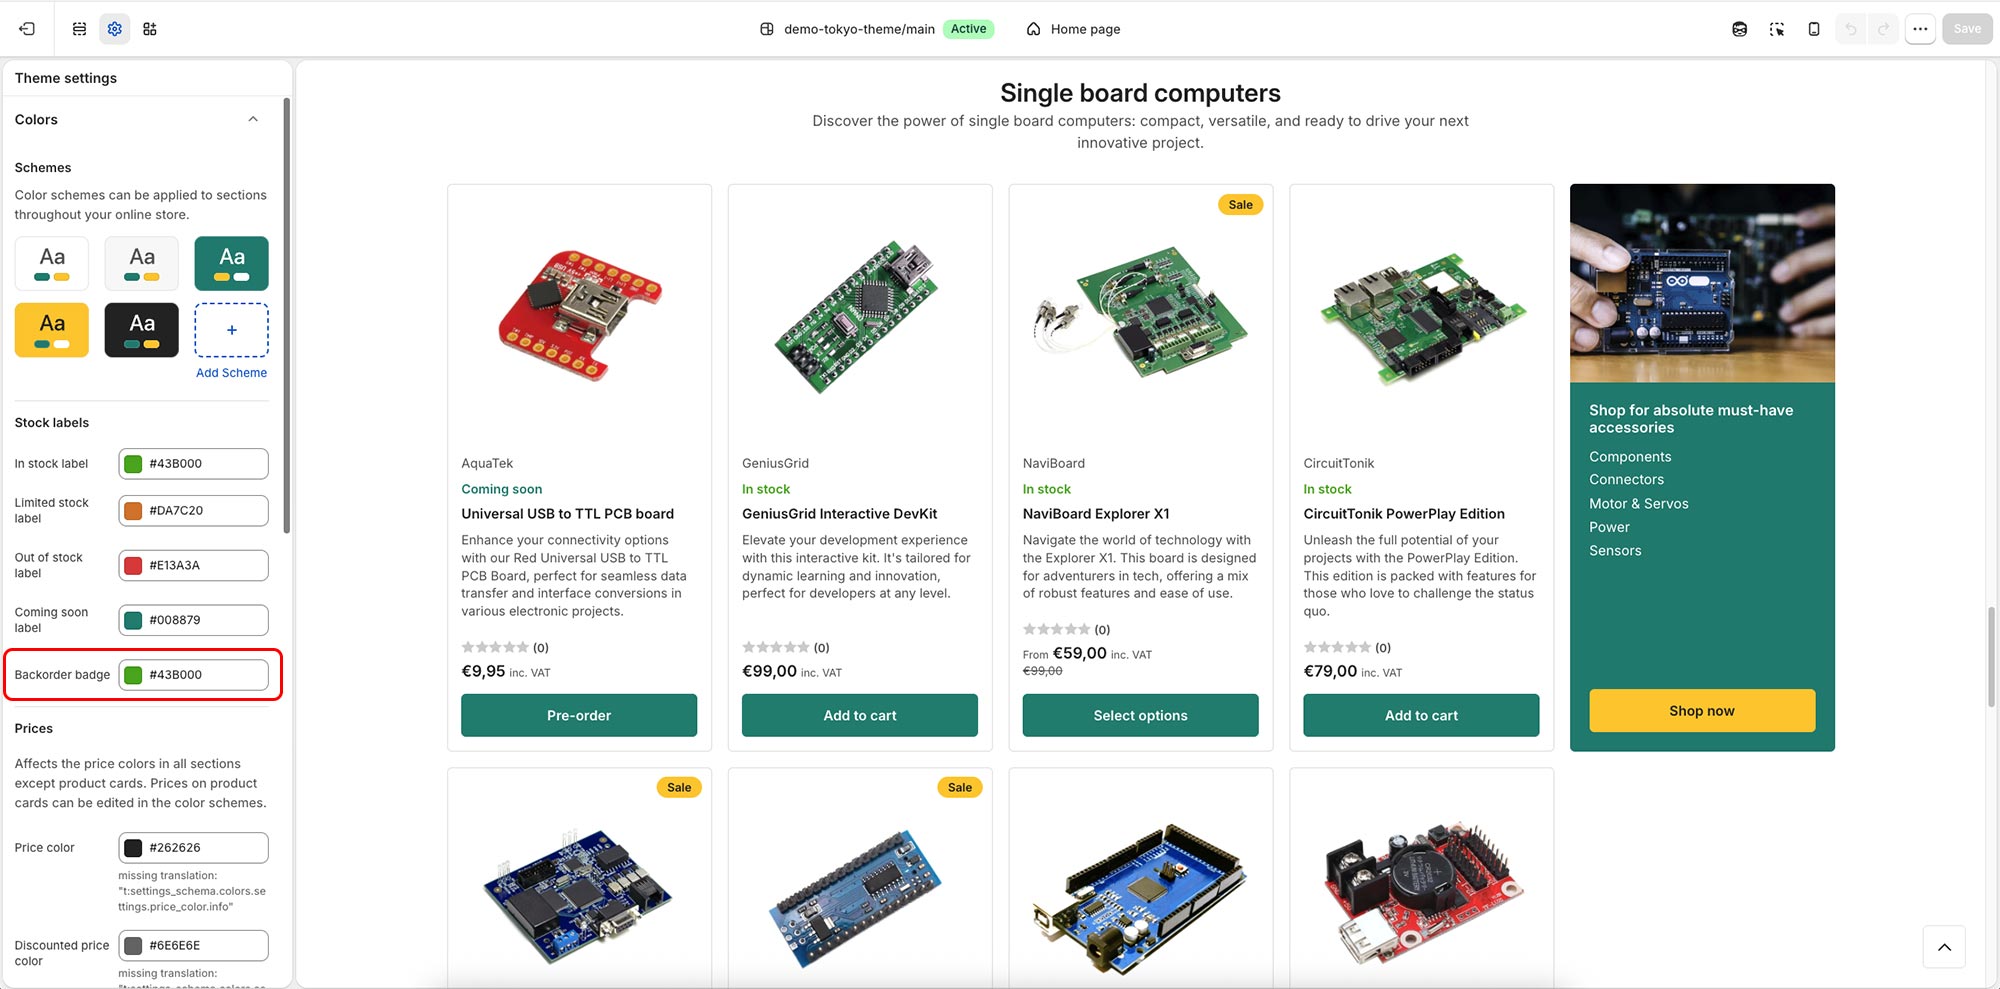
That’s it! Remember to manage your inventory properly to fulfil these backorders when the product is restocked.
Can't find what you are looking for? Feel free to submit a request.