Truly fine
Documentation.
Set up event dates for your events
Last update:
In this guide you’ll learn how to set up blog articles to behave like events, prominently displaying the event date or an event note.

Setting up the metafields
Navigate to your store’s admin, and in the bottom left corner click on Settings. Then navigate to Metafields and metaobjects from the left-hand side menu and then click on Blog posts. You should see the following screen:
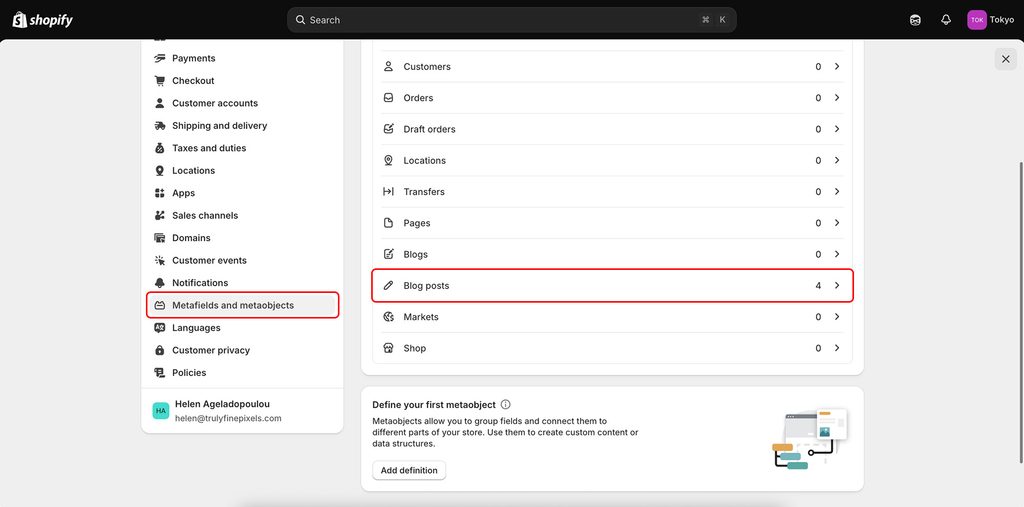
Click on the Add definition button, and in the screen that appears enter the following settings:
Name: Event name (or any name you wish)
Select type: Select “One”, and then select the “Date and time” type.
The details should be exactly as in the screenshot below:
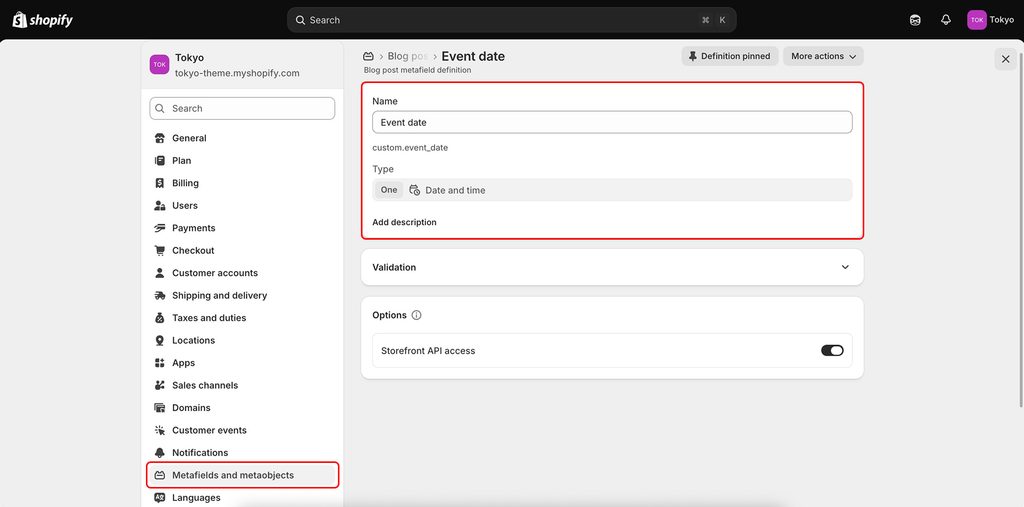
Once done, click on the “Save” button.
Repeat the above process to add another definition with the following settings:
Name: Event note (or any name you wish)
Select type: Select “One”, and then select the “Single line text” type.
The details should be exactly as in the screenshot below:
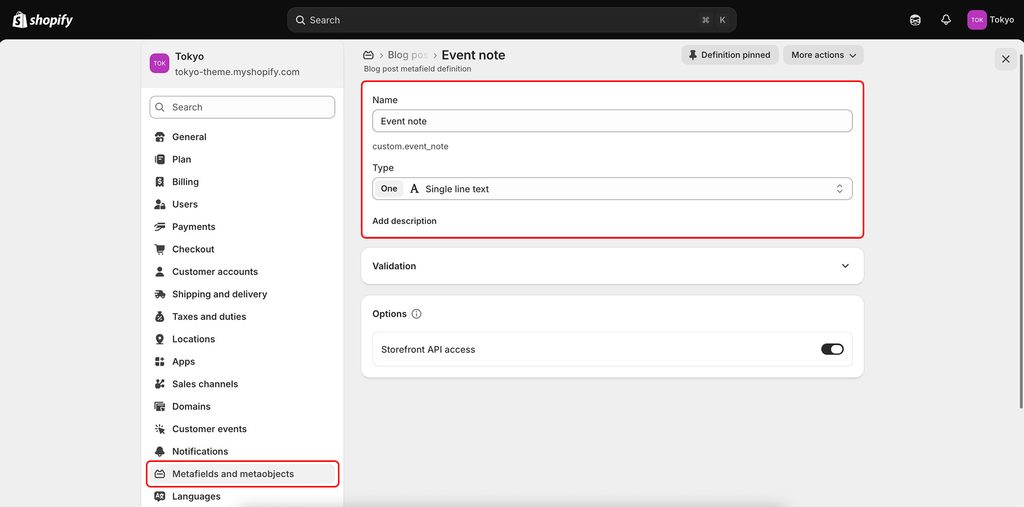
Once done, click on the “Save” button.
Adding an event date on a post
After you’ve set up your metafield, you can assign a value to any blog post you’d like to display as an event.
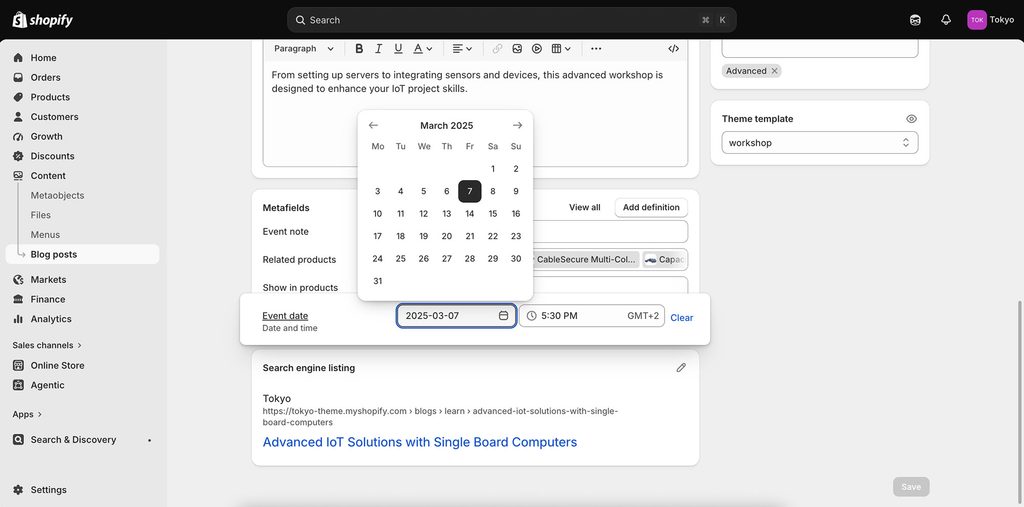
In your store’s admin, navigate to Content and then Blog posts. Create a new post or edit an existing one, and scroll down to the Metafields section. You should see the two new fields we created earlier. If you don’t, click on the “View all” link on the top right corner of the Metafields section.
Click on the event date field to add/edit a date and time in the future:
The Events section makes it possible to list events, and optionally hide the ones that their date and time has passed.
Events that have an event note assigned, will always display the event note instead of the date.
Can't find what you are looking for? Feel free to submit a request.